Foundations of 3D Computer Graphics
Visual Studio Setup
Setting up Windows Environment
- Install Visual Studio 2010. If the installation disk is provided as an ISO file. You can either burn it to a dvd and install from there, or mount it as a virtual disc using the freely available DAEMONTools Lite. Instructions will now assume that you installed to the default directory C:\Program Files\Microsoft Visual Studio 10.0. On 64-bit operating systems, the default directory is C:\Program Files (x86)\Microsoft Visual Studio 10.0.
- Download GLUT and GLEW windows binaries (For GLEW, grab the 32bit windows binaries even if you are on 64bit windows, since the Visual Studio you installed only produces 32bit binaries) from the web
- In the include directory (default: C:\Program Files\Microsoft Visual Studio
10.0\VC\include):
- Create GL directory
- Copy glut and glew headers (glew.h, glut.h, wglew.h) into GL folder
- In the lib directory (default: C:\Program Files\Microsoft Visual Studio 10.0\VC\lib):
- Copy glew32.lib and glew32s.lib into directory
- Copy glut32.lib into directory
- Copy glew32.dll, glut32.dll into C:\WINDOWS\system. Alternatively you can set up environment path variables if you prefer.
Creating your own projects
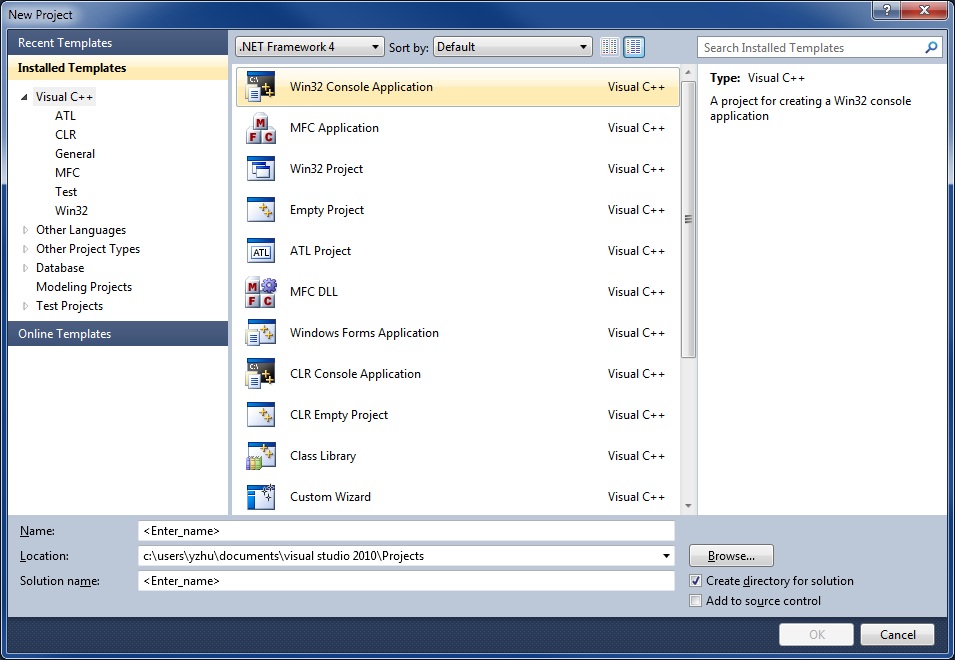
- Choose File->New...->Project from the series of menu options
- On the left tree window, choose Win32, then on the right choose Win32 Console Application
- Name your project and press "OK"
- Press the "Next >" button, not "Finish"
- Check that "Console application" is selected
- Choose "Empty project" instead of "Precompiled header"
- Then click "Finish"
You have now created an empty project to which you can add files and edit them. By choosing empty project instead of the precompiled header option, you avoid having to deal with stdafx issues. If you do not know what precompiled headers are, then you have saved yourself some unnecessary trouble.
To build OpenGL programs, you will have to include the OpenGL, GLUT, and GLEW header files as well as link against the correct library files.
Compiling and Linking with OpenGL Support
- In your main source file, remember to #include <GL/glew.h> and #include <GL/glut.h>
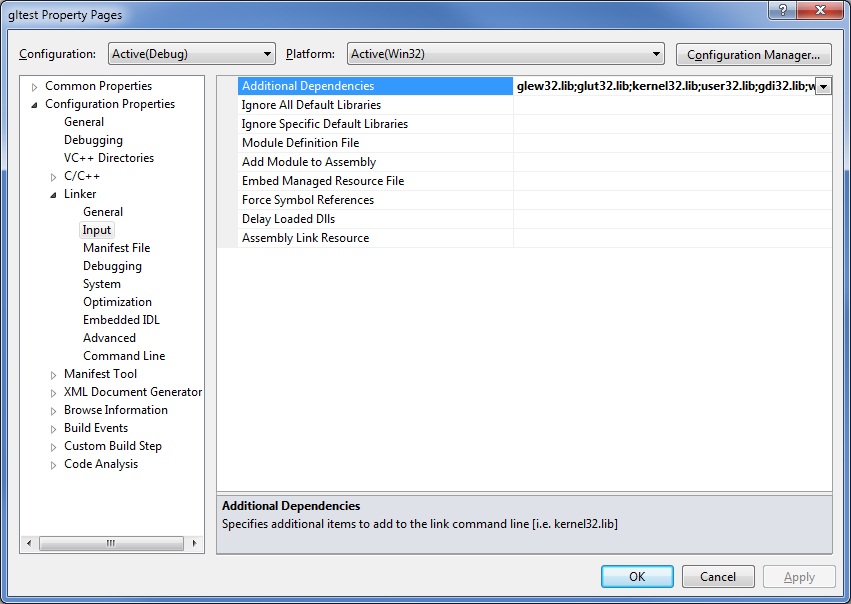
- Click on the project menu and choose the project Properties choice
- Expand "Configuration Properties"
- Expand "Linker" and choose "Input"
- As shown above, enter the Additional Dependencies: glew32.lib glut32.lib
You have now set up the project to include the appropriate headers and build against the correct libraries. These particular instructions will treat GLEW and GLUT as "dynamically linked" libraries. This means that you will have to distribute the glut32.dll and glew32.dll files along with your program for users without GLUT and GLEW installed. GLEW gives you the option of "static linking," which allows you to avoid redistributing glew32.dll. To do this, #define GLEW_STATIC before the #include <GL/glew.h> line. Also choose to link against glew32s.lib instead of glew32.lib.
Ok, you're ready to get coding!